Housing
Decoding Military Housing Inspections: Your Guide to a Smooth Move
Housing inspections are a recurring reality for military families, from move-in to move-out. Understanding what to expect can save you stress and money.
By BaseNeed Team · September 2, 2026 · 37 min read read
military housing inspections move-in inspection move-out inspection security deposit on-base housing off-base housing housing allowance bah
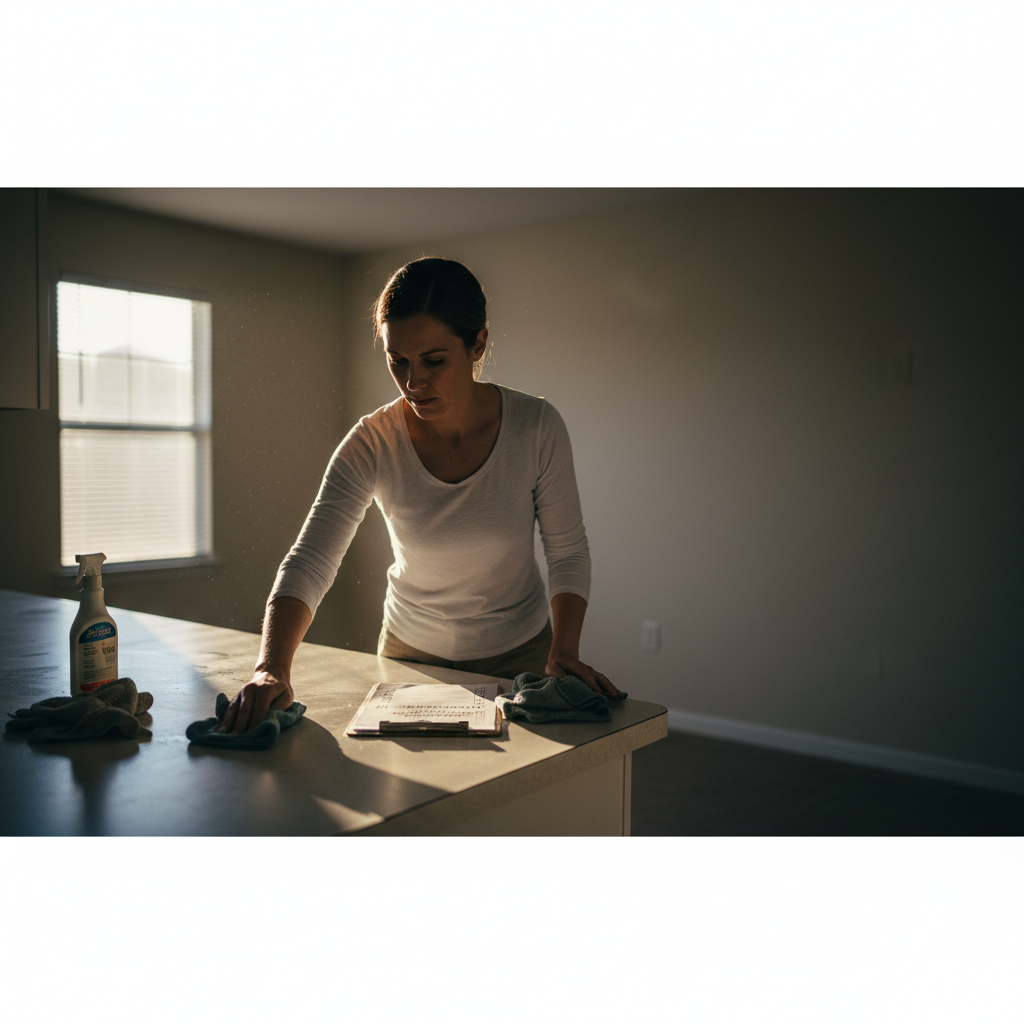
For military families in 2026, housing is a constant, and with it, the reality of inspections. Whether you're moving into an on-base home, preparing to PCS from an off-base rental, or just living life in between, understanding the inspection process is key to a smooth experience and protecting your hard-earned money. No one wants unexpected charges or a lost security deposit, especially during a PCS.
Key Takeaways
- Document everything: take photos and videos during move-in and move-out inspections.
- Understand your lease: know what you're responsible for regarding cleaning and repairs.
- Differentiate between damage and normal wear and tear to avoid unfair charges.
- Clean meticulously: a thorough cleaning can prevent most security deposit deductions.
- Attend all inspections: be present to ask questions, point out issues, and agree on findings.
The Foundation: Why Inspections Matter
Inspections serve a crucial purpose for both you and your housing provider (whether the base housing office or an off-base landlord). For you, they document the condition of the property at different stages, which directly impacts your security deposit or potential charges. For the provider, it ensures the property is maintained and helps identify issues for future residents. Think of it as a detailed snapshot in time. This snapshot is not just a formality; it's a legal and financial safeguard. Without clear documentation, it becomes a "he said, she said" scenario, which rarely benefits the tenant.
The Two Main Types: Move-In and Move-Out
While there might be periodic inspections during your tenancy, the most critical are typically the move-in and move-out inspections. These two inspections frame your entire occupancy period and are the primary determinants of your financial liability.
Move-In Inspection: This is your chance to document every existing scratch, stain, or minor defect. Do not rush this. This document (often called a Condition of Property form or similar) is your best friend when you move out. It establishes the baseline condition of the property before* you move your first box in. This protects you from being charged for pre-existing issues. Think of it as an inventory of imperfections. * Move-Out Inspection: This is where the rubber meets the road. Your housing provider will compare the property's condition against the move-in report, looking for new damage or cleanliness issues. This inspection determines what, if any, deductions will be made from your security deposit or what additional charges you might incur. It's the final assessment of your stewardship of the property.
The Importance of Documentation as Evidence
In any dispute over charges, strong documentation is your most powerful tool. Consider these scenarios: * Scenario 1: Pre-existing Damage: During your move-out, the inspector points to a chip in the countertop and claims you caused it. If you have a clear, date-stamped photo from your move-in inspection showing that exact chip, the charge is immediately invalidated. * Scenario 2: Cleaning Charges: You receive a bill for professional oven cleaning, but you spent hours meticulously cleaning it yourself. Your move-out photos showing a sparkling clean oven, taken just before you left, can serve as proof that further cleaning was unnecessary. * Scenario 3: Normal Wear and Tear: The housing office charges you for repainting an entire room due to minor scuffs. Your move-in report and photos should indicate the original paint condition, and you can then argue these are normal wear and tear, especially if the paint was already several years old.
The more detailed and timestamped your documentation, the stronger your position in any potential disagreement. This applies to both on-base housing, where charges might come from your Basic Allowance for Housing (BAH) allotment, and off-base rentals, where your cash security deposit is at stake.
1. Mastering the Move-In Inspection: Your First Line of Defense
This inspection is arguably the most important. It sets the baseline for your entire occupancy. Don't treat it as a formality. Every minute you spend here meticulously documenting the property can save you hours of disputes and hundreds of dollars later. This isn't just about avoiding charges; it's about establishing a clear, agreed-upon condition of the property from day one.
Step-by-Step for a Thorough Move-In
- Be Present and Punctual: Always attend the move-in inspection. This allows you to ask questions, point out concerns, and ensure the inspector notes everything. Arrive on time, if not a few minutes early, to demonstrate your commitment to a thorough process. Being present also means you can witness exactly what the inspector notes, preventing any "missing" details that were actually pointed out. If the housing provider insists on doing the inspection without you, push back. If that's not possible, immediately conduct your own comprehensive inspection and send your findings to them in writing (email with photos) as soon as possible, requesting acknowledgment.
- Document Everything with Multiple Media:
- Test Everything – Functionality is Key: Don't assume everything works just because it's there.
- Outdoor Areas (if applicable): Don't neglect the exterior, as these can also lead to charges.
- Look Up and Down – Comprehensive Scan:
- Read Your Lease (Off-Base) or Resident Handbook (On-Base): Your lease agreement for off-base housing will outline what is considered "damage" versus "wear and tear," your responsibilities for maintenance, and specifics regarding cleaning at move-out. Understand it before you sign. For on-base housing, you'll have a resident handbook or community guidelines that serve a similar purpose, often detailing specific prohibited items (e.g., certain types of permanent installations) or maintenance expectations (e.g., yard care). Review these documents before your inspection to know what standards to uphold and what to look for.
Pro-Tip: The "Second Pass" Method: After the initial walkthrough with the inspector, if time permits, ask if you can do a quick solo pass through the empty property. This second, independent look often reveals details missed during the guided tour, especially after the inspector has left and you feel less rushed. If you find anything new, immediately document it and send it to the housing office/landlord in writing within 24-48 hours, referencing your official move-in report.
Example Scenario: The Missing Cabinet Door: During your move-in, you notice one of the kitchen cabinet doors is missing a handle. You point this out to the housing officer. * Bad Outcome: The officer says, "Oh, we'll fix that." You nod and move on. No documentation. At move-out, the handle is still missing. You get charged. * Good Outcome: You immediately write "Missing handle on upper-right kitchen cabinet door" on the move-in sheet, initial it, and have the officer initial it. You take a photo of the cabinet door. If it's not fixed, you can't be charged for it being missing. If they do fix it, you have documented proof it was initially missing.
This detailed approach ensures that your move-in inspection truly acts as your first, strongest line of defense.
2. Navigating Periodic Inspections (On-Base)
For those living in on-base housing, periodic inspections are a regular occurrence, typically quarterly, semi-annually, or annually. These are generally less about finding damage that will be charged back to you immediately (unless it's egregious or a safety hazard) and more about ensuring safety, cleanliness, and compliance with community standards. They serve as a proactive measure for the housing authority to maintain their properties and ensure a quality living environment for all residents.
What to Expect and How to Prepare
- Advance Notice is Standard: You'll receive advance notice of these inspections. This notice period can vary but is usually between 24 hours and a week, often via email, flyer, or notice on your door. Use this time wisely. Review your lease or resident handbook for specific requirements related to periodic inspections. If you will be away, coordinate with the housing office for key access or to reschedule if permitted.
- Safety Checks – Top Priority: Inspectors will often check for:
- Cleanliness – Beyond Basic Tidiness: While they aren't expecting a show home, a reasonable level of cleanliness is required.
- Exterior – Curb Appeal and Safety: If your unit has an exterior space:
- Pet Compliance – Odor and Damage: If you have pets, ensure:
- Unauthorized Modifications – Stick to the Rules: Avoid making any permanent alterations to the property without prior written approval from the housing office. This includes painting walls a non-approved color, installing unapproved fixtures, or building structures in the yard. Temporary decor is usually fine, but permanent changes require permission.
On-Base Specifics and Important Considerations:
- Branch/Installation Variation: Rules for on-base housing can vary significantly by military branch (Army, Navy, Air Force, Marines, Coast Guard), specific installation, and even the housing provider (many on-base housing communities are privatized and operated by civilian companies like Balfour Beatty, Lincoln Military Housing, Lendlease, etc.).
- Resident Handbook/Community Guidelines: Always refer to your specific Resident Handbook or Community Guidelines document. This is your primary source of truth for all rules, expectations, and procedures. These documents often detail inspection checklists, maintenance responsibilities, pet policies, and prohibited items.
- Direct Communication: If in doubt, directly contact your housing office. They are there to provide clarification. It's better to ask than to guess and potentially incur a violation notice. You can often find contact information and specific policies in your base guides on BaseNeed.
- Consequences of Failed Inspections: While a failed periodic inspection might not immediately mean charges, it often results in a "cure or quit" notice, requiring you to remedy the issues within a specific timeframe (e.g., 72 hours, 7 days). Failure to comply can lead to further inspections, fines, or in extreme cases, eviction proceedings. Repeated minor violations can also affect your good standing with the housing office.
- Your Presence: While not always mandatory for periodic inspections (housing often has master keys), being present allows you to address any immediate concerns, clarify issues, and ensure the inspector notes things accurately. If you cannot be present, ensure your home is in pristine condition to avoid any misunderstandings.
Example Scenario: Preparing for a Quarterly Inspection: You receive a notice for a quarterly inspection next week. 1. Check Handbook: You review your resident handbook for the inspection checklist. It mentions smoke detectors, clean common areas, and clear egress. 2. Safety First: You test all smoke detectors and carbon monoxide detectors. You ensure the fire extinguisher (provided by housing) is accessible. 3. Cleanliness Blitz: You deep clean bathrooms and kitchen, vacuum all carpets, mop hard floors, and tidy up all rooms. You specifically address any pet hair or odors. 4. Exterior Check: You mow the lawn, pull weeds, and make sure your trash bins are stored out of sight. 5. Documentation (Pre-emptive): You take a few photos of key areas after cleaning, just in case any false claims are made about the cleanliness before the inspection. 6. Attend: You plan to be home during the inspection window to walk through with the inspector.
By following these steps, you not only ensure a smooth periodic inspection but also contribute to the overall upkeep of your home, making your final move-out less daunting.
3. The Grand Finale: Acing the Move-Out Inspection
This is the moment of truth for your security deposit or the final accounting of charges from on-base housing. A well-executed move-out can save you hundreds, if not thousands, of dollars, and significantly reduce stress during the already chaotic PCS process. This requires meticulous planning and execution.
The Ultimate Move-Out Checklist
- Start Early – The Golden Rule: Don't wait until the last minute. Begin cleaning and minor repairs weeks before your scheduled move-out. Creating a detailed schedule will break down the overwhelming task into manageable steps. Allocate specific days for certain rooms or tasks. For a three-bedroom house, a realistic timeframe might be 3-5 full days of dedicated cleaning and maintenance after all your belongings are packed and moved.
- Consult Your Move-In Report & Lease: This is critical. Compare the current condition to your detailed move-in documentation. This helps you identify what you are responsible for addressing. If the move-in report noted "small stain in living room carpet," you are not responsible for that stain. If it noted "newly cleaned carpet," and now there's a large pet stain, you are responsible. Your lease or resident handbook will also outline specific cleaning requirements (e.g., professional carpet cleaning, oven cleaning to a specific standard).
- Deep Clean Everything – The "Move-In Ready" Standard: Aim to leave the property in the condition you would want to find it when moving in. This often means cleaning beyond your regular weekly tidy-up.
- Address Repairs (Your Responsibility) – Differentiate "Wear and Tear":
- Remove All Personal Property – No Exceptions: This cannot be stressed enough. Absolutely nothing should be left behind unless specifically agreed upon in writing with the housing office or landlord. Leaving items (even cleaning supplies or small forgotten belongings) can result in significant removal and disposal fees, which are often far more expensive than disposing of them yourself. Do one final sweep of every closet, cabinet, and drawer. Check the mailbox, garage, and any outdoor storage.
- Take Final Photos & Videos – Your Post-Cleaning Proof: After everything is cleaned, repaired, and removed, and before you return the keys, take a fresh, comprehensive set of photos and videos.
- Attend the Final Inspection – Be Prepared to Advocate: Just like move-in, be present.
- Return Keys & Get Receipt: Ensure all keys, access cards, gate remotes, and garage door openers are returned as instructed. Get a dated receipt for their return. This confirms you have relinquished possession of the property. For off-base, this usually starts the clock for your landlord to return your security deposit.
On-Base Housing Specifics: On-base housing may have slightly different procedures, such as a "pre-inspection" a few weeks before your final move-out. Take these seriously! They are an opportunity to get feedback on what needs to be addressed before the final inspection, giving you time to correct issues without penalty. Pay close attention to any "punch list" they give you.
Example Scenario: The Pet Stain Dispute: You have a pet, and during the move-out inspection, the housing officer points to a large, dark stain on the living room carpet, claiming it's new pet damage. * Without Documentation: You're likely charged for professional cleaning or carpet replacement. With Documentation: You pull up your move-in photos, showing a large, identical stain on the carpet. The housing officer can't charge you. Alternatively, if the stain is* new, but you had the carpets professionally cleaned and have the receipt and photos of the clean carpet, you can argue against excessive charges or demonstrate due diligence.
Acing the move-out inspection is about meticulous preparation and strong documentation. It's your last chance to protect your finances before PCS.
4. Understanding "Normal Wear and Tear" vs. Damage
This distinction is crucial, especially for off-base rentals where your security deposit is on the line, but it also applies to on-base housing where excessive "damage" can result in charges. Property managers are legally prohibited from charging tenants for "normal wear and tear." However, the interpretation of what constitutes "normal" can sometimes be subjective, which is why your documentation is so vital.
- Normal Wear and Tear: This is the natural deterioration of a property that occurs with ordinary use over time, despite reasonable care and maintenance by the tenant. It's the expected aging process of a home. The key elements are "natural," "ordinary use," and "over time."
- Damage: This is harm to the property due to tenant neglect, abuse, carelessness, or accidents, going beyond what would reasonably be expected from normal occupancy. This means the item needs repair or replacement to return it to its original condition.
Key Point: Landlords cannot charge you for normal wear and tear. They can only deduct from your security deposit for damage beyond this. Your documentation from the move-in inspection is vital here. If the inspector points to a scuff you documented at move-in, your photo is your proof. The age of the property and the length of your tenancy also play a role; a carpet expected to last 7 years will have more "normal wear and tear" after a 5-year tenancy than a 6-month tenancy.
The "Repair vs. Replace" Conundrum: Sometimes, the dispute isn't whether something is damaged, but the cost of repair. A landlord might attempt to charge for a full carpet replacement due to a small stain. If the stain could be professionally cleaned for $100, charging $1000 for replacement is unreasonable. This is where your ability to argue for a proportional charge comes in, backed by evidence of your cleaning efforts.
Legal Recourse: If you believe you've been unfairly charged, researching your state's landlord-tenant laws (for off-base) or the military's housing regulations (for on-base) can provide specific guidance on what constitutes normal wear and tear and your rights to dispute charges.
5. Security Deposits and Your BAH
For off-base housing, your security deposit is often one to two months' rent, which for many military families, comes directly from their BAH rates by area. Protecting this deposit is paramount, as it can represent a significant portion of your liquid savings. For on-base housing, while you don't typically pay a security deposit in the same way, excessive damage can still lead to charges that reduce your BAH or require out-of-pocket payments.
BAH and Deposits: The Financial Link: Your Basic Allowance for Housing (BAH) is intended to cover your monthly housing expenses. However, the security deposit is usually a lump sum out-of-pocket expense paid upfront. When you move, you want that money returned to fund the deposit on your next rental. Losing a security deposit to unfair charges means you're effectively paying twice* for housing – once for the rent you already covered with BAH, and again for a deposit you don't get back. Understanding how to calculate your BAH can help you budget for future deposits and ensure you're getting the correct amount. Use a BAH calculator to estimate your monthly allowance based on your rank, dependency status, and duty station zip code. Budgeting for a security deposit, along with first and last month's rent, is a critical component of PCS financial planning.
- Lease Terms: Your Contractual Rights and Responsibilities: Your off-base lease will specify the conditions for security deposit return. Key elements to look for include:
- Dispute Process: Fighting for Your Money: If you disagree with deductions, don't just accept them. Most states have laws governing security deposit returns that provide a formal dispute process.
Example Scenario: Unjustified Painting Charge: You receive an itemized deduction for $500 for "repainting living room" after moving out of an off-base rental. * Your Action: You review your move-in report, which stated "Walls in good condition, minor wear." Your move-out photos show only minor scuffs typical of normal wear and tear after 2 years. The paint was 5 years old when you moved in. * Dispute Letter: You send a certified letter disputing the charge, citing state law on wear and tear, attaching copies of your move-in report and move-out photos, and stating that the cost of painting due to normal aging and minor scuffs is the landlord's responsibility. You might also include a clause from your lease (if it exists) that differentiates wear and tear from damage.
By being proactive, informed, and diligent in your documentation, you significantly increase your chances of recovering your full security deposit, safeguarding your BAH, and avoiding unexpected financial hits during a PCS.
6. Renting Off-Base: Additional Considerations
While much of the advice above applies universally, off-base rentals introduce a layer of civilian landlord-tenant laws and practices that military families must navigate. These considerations are critical for a smooth tenancy and PCS.
- Landlord-Tenant Laws: Know Your Rights and Obligations: These vary significantly by state, county, and even city. What's legal in Texas might not be in California.
- Military Clause (SCRA): Your PCS Protection: This is paramount for military families. Ensure your lease includes a military clause (also known as a "break lease clause" or specific language referencing the Servicemembers Civil Relief Act, or SCRA). This act provides legal protections for servicemembers.
- Pet Policies: Clarity is Key: If you have pets, ensure the pet policy is explicitly clear in your lease.
- Communicating with Landlords: Create a Paper Trail: Maintain open, written communication with your landlord or property management company.
- Finding Military-Friendly Housing: Leverage Resources:
Example Scenario: Unexpected PCS and Lease Break: You're renting off-base with a 12-month lease. Six months in, you receive PCS orders to a new duty station starting in 60 days. * Without SCRA/Poor Communication: You might be on the hook for the remaining 6 months' rent, plus a lease break penalty. * With SCRA and Proper Communication: You immediately check your lease for the SCRA clause. You draft a written notice of lease termination, attach a copy of your PCS orders, and send it via certified mail to your landlord. Your lease terminates 30 days after your next rent payment, minimizing your financial liability and allowing you to move without penalty.
By proactively addressing these off-base specific considerations, military families can protect their finances, ensure a smoother transition, and avoid common pitfalls associated with civilian rental agreements.
FAQ
What do they look for in a military housing inspection?
In a military housing inspection, whether on-base or off-base (move-in/move-out), inspectors look for a comprehensive range of items. This includes cleanliness (kitchens, bathrooms, floors, walls, appliances), damage beyond normal wear and tear (holes in walls, deep scratches on floors, broken fixtures, pet damage), and compliance with lease terms or housing regulations. They will also check for safety issues (working smoke/carbon monoxide detectors, clear exits, electrical hazards, presence of mold or water leaks) and the overall upkeep of the property, inside and out, including yard maintenance if applicable. The goal is to ensure the property is well-maintained and ready for future residents.
How can I prepare for a move-out inspection on base?
To prepare for a move-out inspection on base: 1. Review Documentation: Re-read your move-in inspection report and your Resident Handbook/Community Guidelines for specific cleaning standards and tenant responsibilities. 2. Deep Clean: Meticulously clean every surface, room, and appliance. Pay special attention to kitchens (oven, refrigerator, microwave, cabinets), bathrooms (toilets, showers, sinks, grout), and floors (vacuum carpets, mop hard surfaces). Consider professional carpet cleaning if required or if there are significant stains. 3. Repair Minor Damage: Fill small nail holes, replace burnt-out light bulbs, and address any other minor repairs you are responsible for. 4. Remove All Belongings: Ensure the property is completely empty of your personal items, including trash and forgotten items in closets or cabinets. 5. Clean Exterior: Mow the lawn, trim bushes, and tidy up any outdoor spaces. 6. Safety Checks: Ensure all smoke and carbon monoxide detectors are working. 7. Take Final Photos/Videos: Document the condition of the property after cleaning and removal of your items, just before the inspection. Date-stamp all media. 8. Attend Inspection: Be present to walk through with the inspector, clarify issues, and prevent unfair charges.
Can I dispute charges from a military housing inspection?
Yes, you can absolutely dispute charges from a military housing inspection, whether on-base or off-base, if you believe they are unfair, for damage that was pre-existing, or for what constitutes normal wear and tear. The key to a successful dispute is strong documentation. 1. Gather Evidence: Collect all your supporting documents: the original move-in inspection report, your date-stamped photos and videos from both move-in and move-out, cleaning receipts (e.g., professional carpet cleaning), and any written communication with housing/landlord regarding repairs or issues. 2. Formal Written Dispute: Write a formal letter or email to the housing office/landlord detailing your specific disagreements with the charges. Reference your evidence for each disputed item. 3. Adhere to Procedures: Follow the specific dispute process outlined in your lease, Resident Handbook, or local landlord-tenant laws. 4. Seek Assistance: If needed, contact your base's Legal Assistance Office for advice or assistance in drafting your dispute letter. For off-base rentals, you may also consider small claims court if an agreement cannot be reached.
What is normal wear and tear in military housing?
Normal wear and tear in military housing (or any rental) refers to the expected deterioration of a property over time due to ordinary use and the natural aging process, despite the tenant taking reasonable care. Examples include: * Faded paint or minor, superficial scuffs on walls in high-traffic areas. * Slightly worn or matted carpet in common pathways. * Minor scratches on flooring from everyday foot traffic or furniture movement over an extended period. * Loose door handles or cabinet hinges that develop over time. * Sun-faded window blinds or curtains. * A worn finish on an older appliance. This contrasts with "damage," which results from tenant neglect, abuse, carelessness, or accidents (e.g., large holes in walls, pet stains, burns, broken fixtures). Landlords/housing providers cannot charge for normal wear and tear.
Does off-base housing have inspections like on-base housing?
Yes, off-base housing typically has similar types of inspections to on-base housing, though the frequency and formality may vary: 1. Move-In Inspection: This is standard for off-base rentals and is critical for documenting the property's condition before you move in, protecting your security deposit. 2. Move-Out Inspection: Also standard, this inspection compares the property's condition to the move-in report to determine any deductions from your security deposit. 3. Periodic Inspections: While less frequent or scheduled than on-base housing, landlords may conduct periodic inspections during tenancy (e.g., annually, or if there's a suspected issue like a leak). However, they generally require advance notice (typically 24-48 hours, as per state law or lease agreement) before entering, except in emergencies. The purpose is usually for maintenance, safety checks, or ensuring lease compliance. Unlike on-base, where inspections can be very structured, off-base periodic inspections might be more informal.
How does BAH relate to off-base housing inspections?
Your Basic Allowance for Housing (BAH) covers your monthly rent for off-base housing, but it's crucial to understand its indirect relation to inspections. The security deposit, often equivalent to one to two months' rent, is an out-of-pocket expense. While BAH helps you pay the monthly rent, you typically pay the security deposit from your own funds. Therefore, successful inspections directly impact your ability to get that security deposit back. A clean, damage-free move-out, supported by strong documentation, ensures you recover your full deposit. This, in turn, helps you fund the security deposit for your next off-base rental after a PCS, effectively protecting the "cash component" of your housing allowance and preventing you from having to pay additional funds beyond your BAH for housing costs. A lost security deposit means you're effectively paying more for housing than your BAH intended.
What to Do Next
Start a dedicated folder (digital and/or physical) for all housing-related documents: your lease, move-in reports, inspection notices, photos and videos (organized by date and room), receipts for cleaning or repairs, and all written communication with your housing provider or landlord. This proactive step will be invaluable for every move and every inspection you encounter throughout your military career. Having this organized "housing dossier" will not only save you potential financial headaches but also significant stress during the demanding PCS process. For more help, check out our general military life resources.
Read Full Article on BaseNeed →
Related Housing guides
- → Understanding BAH & OHA in 2026: Your Housing Allowance Guide — 14 min read read
- → Decoding Your Military Housing Journey: On-Base, Off-Base & Inspections — 17 min read read
- → Mastering Your Military Housing: Budgeting & Saving in 2026 — 16 min read read
- → Unpacking Your Housing Rights: A Renter's Guide for Military Families — 26 min read read
- → Decoding Military Housing Options: On vs. Off Base in 2026 — 30 min read read
- → Military Housing Inspections: Your 2026 Guide to a Smooth Move-Out — 33 min read read